In this guide, I will show you how to change a default RPD port.
When you connect to a computer (either a Windows client or Windows Server) through the Remote Desktop client, the Remote Desktop feature on your computer “hears” the connection request through a defined listening port (3389 by default). You can change that listening port on Windows computers by modifying the registry.
Change RDP port
1. Start the registry editor (Type regedit in the Search box)
2. Navigate to the following registry subkey: HKEY_LOCAL_MACHINE\System\CurrentControlSet\Control\Terminal Server\WinStations\RDP-Tcp\PortNumber
3. Click Edit > Modify, and then click Decimal.
4. Type the new port number, and then click OK.
5. Close regedit.
Firewall configuration
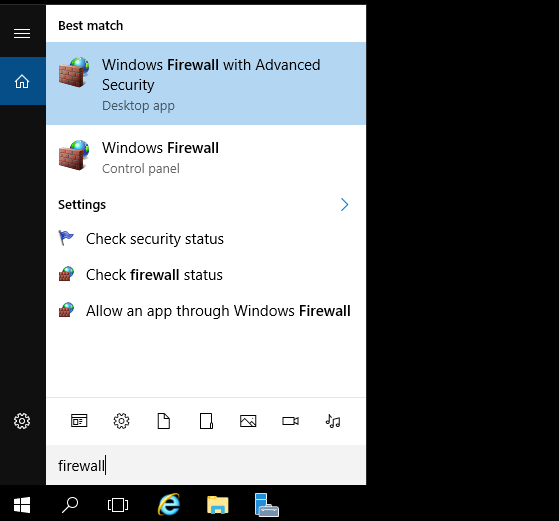
1. Open Windows Firewall with Advanced Security (Type firewall in the Search box)
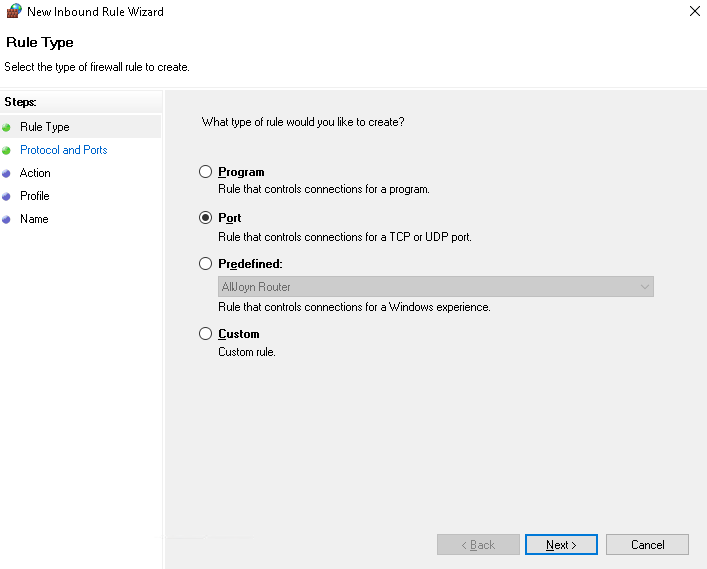
2. Right-hand click on Inbound Rules or Outbound Rules to create a New Rule.
3. Select the Port option.
4. Choose the type of connection to apply and enter a new port.
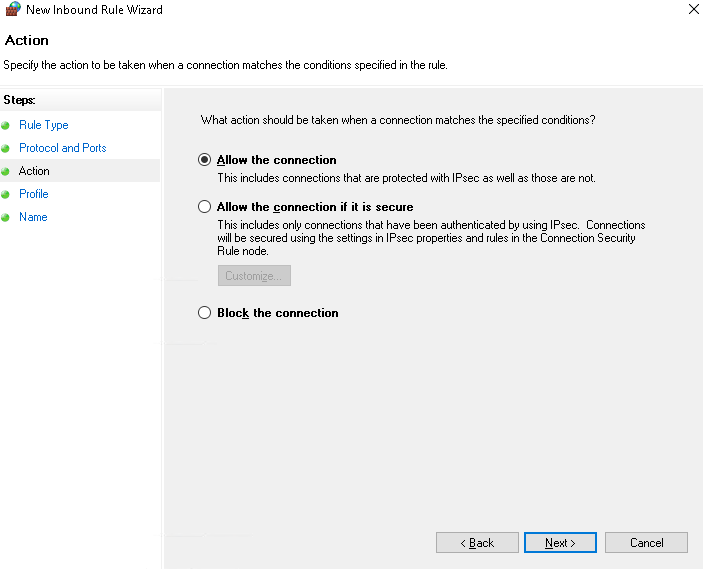
5. Select allow the connection.
6. Select the boxes to apply the rule.
7. Name your new rule.
8. Hit the button Finish and your port is opened.
9. Now restart your computer and connect with a new port.
Testing the connection
As you can see, the port has been successfully changed.


